Category Archives: Desserts

Thomas Keller Oreos with peanut butter ganache

These cookies represent a convergence of two truly miraculous recipes– hang on, of course I’ll tell you. First, what seems like a bajillion years ago, I had a Super Bowl party, the highlight of which was probably a delivery by a thoughtful friend from Bouchon Bakery of macarons and Thomas Keller Oreos (the lowlight, if you’re interested, is documented here). Still intimidated by the idea of creating macarons at home, I was determined to find a recipe for those Oreos, so that I could enjoy the chocolate-y, wafer-y goodness whenever  I wanted. Of course, the internets had exactly what I needed, and I also happened to have a good amount of peanut butter ganache left over from a cupcake experiment about a week earlier. And so, given the Scientific Fact that chocolate + peanut butter = OMG I want to eat all of this right now, I knew what I had to do:

THIS. I didn’t have a small cutter, and ended up with absolutely enormous cookies, but the best part about this dough is that it seems to be endlessly variable, shape-wise. So get seasonal! Certainly there is some sort of Uncle Sam cookie cutter that I can use for the 4th, right?

Thomas Keller Oreos (recipe from GraceNotes NYC)

makes about 3 dozen sandwich cookies

Ingredients
1 1/2 cups plus 3 Tbsp all purpose flour
3/4 cup sugar
3/4 cup plus 1 Tbsp unsweetened cocoa powder
1/2 tsp baking soda
1 1/2 tsp salt
15 Tbsp unsalted butter, cut into 3/4″ cubes, at room temperature

Method
In a large mixing bowl, combine the flour, sugar, cocoa, baking soda, and salt, and mix on low speed (Note: make sure your bowl is big enough so everything doesn’t splatter!)

With the mixer running, add the butter, a piece at a time.

The mixture will be dry and sandy at first, but over 2 minutes, will form pebble-sie pieces that start to cling together. Stop the mixer and transfer the dough to your board.

Preheat oven to 350F. Separate dough into 2 pieces. Roll each piece of dough between 2 pieces of plastic wrap or parchment paper to 1/8″ inch thick. Using the cutter of your choice, cut into rounds. Scraps can be pieced together and rolled out again. Place 1/2″ apart on baking sheets lined with Silpat liners or parchment paper.

Bake for 12-15 minutes, rotating halfway through baking. Remove and cool in the pan for 5 minutes, then transfer cookies to a cooling rack. Cool completely.

Peanut Butter Ganache Filling (from the Crazy for Cupcakes cookbook)
(Note: the original recipe was for “peanut butter frosting,” but based on the texture of the finished product, I’m going to go ahead and call it ganache. Feel free to disagree, but you’d totally be wrong.)

Ingredients
12 tablespoons (1 1/2 sticks) unsalted butter, at room temperature
2 cups firmly packed brown sugar
4 tablespoons water
1 1/3 cups smooth or crunchy peanut butter
2 tablespoons vanilla extract

Method

In a saucepan over high heat, bring the butter, brown sugar, and water to a boil and continue to boil for 2 minutes. Remove from heat.

Stir in the peanut butter and vanilla and beat until smooth. The finished product will be pretty runny, so you can leave it out to firm up at room temperature, or pop it into the fridge to speed things up.

(Another note: this recipes yields a crazy amount of ganache. You could easily half it and have enough for the cookies, but the leftovers are nice with ice cream…or a sneaky teaspoon here and there.)

Lemon icebox pie

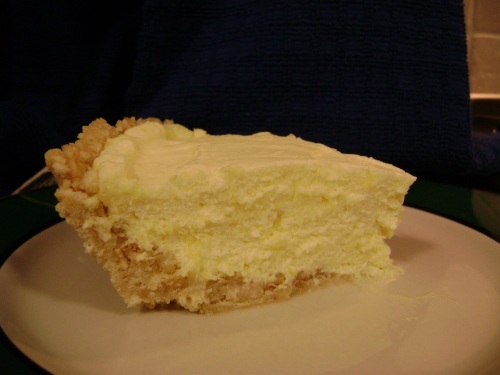
On a recent weekend trip to Tahoe with a group of friends there were two upcoming birthdays among us. A girlfriend of one of the birthday boys wanted to whip something up, and didn’t want to mess with trying to bake a cake at Tahoe’s altitude (I don’t blame her– I am horrified by baking above, say, 1000 feet?). I knew this would be exactly the thing, despite the fact that I was initially mocked for making a semi-frozen dessert when it was snowing outside. And you know what? Where some might see the cold/cold combo as unfavorable, I like to think that they matched nicely. (Plus, I got to bring about half a pie home– but for that, I blame the pizzas that preceded the dessert.)

Lemon Icebox Pie (slightly adapted from More From Magnolia: Recipes from the World Famous Bakery and Allysa Torey’s Home Kitchen)

Ingredients
Crust:
1/2 cup (1 stick) unsalted butter, very soft
2 cups vanilla wafer crumbs [This is slightly less than a box. I don’t need to tell you what to do with the leftovers, right?]

Filling:
1-1/2 cups heavy cream
1-1/2 cups Lemon Curd Filling (recipe below)

Method
To make the lemon curd filling, you will need:
12 egg yolks, at room temperature
3 tablespoons grated lemon zest
1 cup fresh lemon juice
1/2 teaspoon lemon extract
1-1/2 cups sugar
1 cup (2 sticks) unsalted butter, cut in small pieces

In a medium-size saucepan, whisk in the first 5 ingredients until thoroughly combined. Using a wooden spoon, stir constantly over medium heat. Cook about 20     minutes until thick and bubbly. Remove from heat and add the butter, one piece at a time, stirring to incorporate. Chill until firm (overnight in the fridge is preferable, but you can     definitely get away with much less time in the freezer).
**Makes 3-1/2 cups, or enough filling for 1 two-or-three layer cake, so you will have extra.     This is not an actual problem, because this lemon curd is miraculous and awesome on     everything from toast to pound cake to…teaspoons. (What? Don’t act like you’ve never done     something like that.)

To make the crust:
In a small bowl, combine the butter and the vanilla wafer crumbs. Press firmly into a lightly buttered 9-inch glass pie dish. Wrap tightly with plastic and place in the freezer for 30 minutes.

Meanwhile, make the filling:
In a large bowl, on the medium speed of an electric mixer, beat the heavy cream until stiff peaks form. Gently fold in the Lemon Curd. Pour into the prepared crust and chill for at least 4 hours or overnight. Garnish with raspberries, blueberries, lemon slices, or more whipped cream.

Makes one 9-inch pie

Chewy brownies

It is my firm belief that these brownies could solve many of the world’s problems. Maybe not childhood obesity or diabetes, sure, but at least a couple of the others. This recipe comes from Cook’s Illustrated, an always-trusted name, especially in baking, because their test cooks have the dedication to make brownies for two months until they have found the perfect texture, flavor, and shiny, crackly top. And then they print it up and send it to me! See? Magic. Apparently the secret ingredients include a mix of butter and oil, as well as a couple egg yolks thrown in for good measure. Don’t worry, though– it’s pretty hard to eat more than one of these in a two-hour time period because they are super-rich and satisfying.

Chewy Brownies

Cook’s Illustrated, March/April 2010 [well worth the subscription price of$20 or so annually, but I’m glad mine was a gift.]

Note: For the chewiest texture, it’s important to let the brownies cool thoroughly before cutting. If your baking dish is glass, cool the brownies 10 minutes, then remove them from the pan (otherwise, the higher heat retention of glass will cause them to overbake). CI recommends Callebaut Intense Dark Chocolate L-60-40NV (likely available at higher-end markets and specialty shops) and Ghirardelli Bittersweet Chocolate Baking Bar (fairly easy to find in supermarkets) as the bittersweet component, and Scharffen Berger unsweetened chocolate. Store leftovers in an airtight container for up to 4 days– but I doubt they’ll last that long.

Ingredients

  • 1/3 cup Dutch-processed cocoa
  • 1 1/2 teaspoons instant espresso (optional) [But totally recommended. Coffee is one of those flavors that makes chocolate dishes really sing. CI recommends Caffe D’Vita, Cafe Bustelo, and Medaglia D’Oro– which I used.]
  • 1/2 cup plus 2 tablespoons boiling water
  • 2 ounces unsweetened chocolate, finely chopped
  • 4 tablespoons (1/4 stick) unsalted butter, melted
  • 2 large eggs
  • 2 large egg yolks
  • 2 teaspoons vanilla extract
  • 2 1/2 cups (17 1/2 ounces) sugar
  • 1 3/4 cups (8 3/4 ounces) unbleached all-purpose flour
  • 3/4 teaspoon table salt
  • 6 ounces bittersweet chocolate, cut into 1/2-inch pieces [I followed this direction exactly when I made them for the first time, but I think I would cut them smaller next time. Depends on how big you want your chocolate chunks!]

Process

Adjust oven rack to lowest position and heat to 350 degrees. Make a foil sling by placing two pieces of foil lengthwise and width-wise (folding over if necessary), making sure that there is a good overhang on each edge f the pan. Spray with nonstick cooking spray.

Whisk cocoa, espresso powder, and boiling water together in a large bowl until smooth. Add unsweetened chocolate and whisk until chocolate is melted. Whisk in melted butter and oil. (Mixture will look curdled, but don’t worry.) Add eggs, yolks, and vanilla and continue to whisk until smooth and homogenous. Whisk in sugar until fully incporated. Add flour and salt and mix with a rubber spatula until combined. Fold in bittersweet chocolate pieces. [I usually prefer to mix things in my stand mixer, but in this case it is easier– and requires less cleanup– to just do it all by hand.]

[Optional step: offer the mostly-scraped bowl to your husband, who is strange and prefers baked goods in their raw form. This will probably help a little with cleanup.]

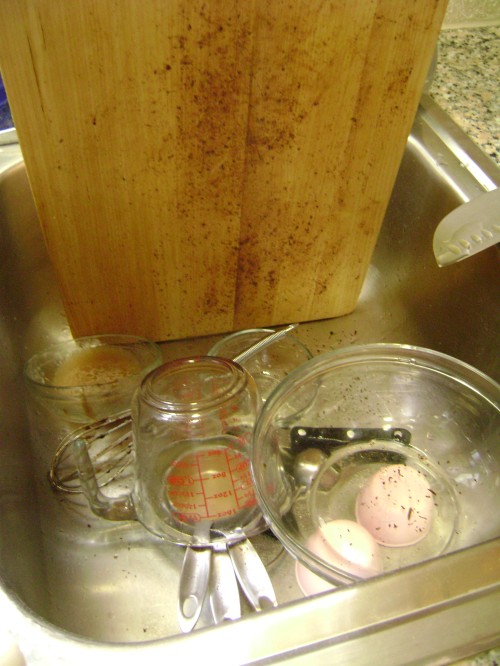
[But, oh…there will still be plenty of dishes to wash. This is typically the curse of CI’s precise-but-perfect recipes.]

Scrape batter into prepared pan and bake until toothpick inserted halfway between edge and center comes out with just a few moist crumbs attached, 30 to 35 minutes.

Using foil overhang, lift brownies from pan. Return brownies to a wire rack and let cool completely, for about an hour. Cut into 2-inch squares [seriously, you will likely not want them bigger than this] and serve.